
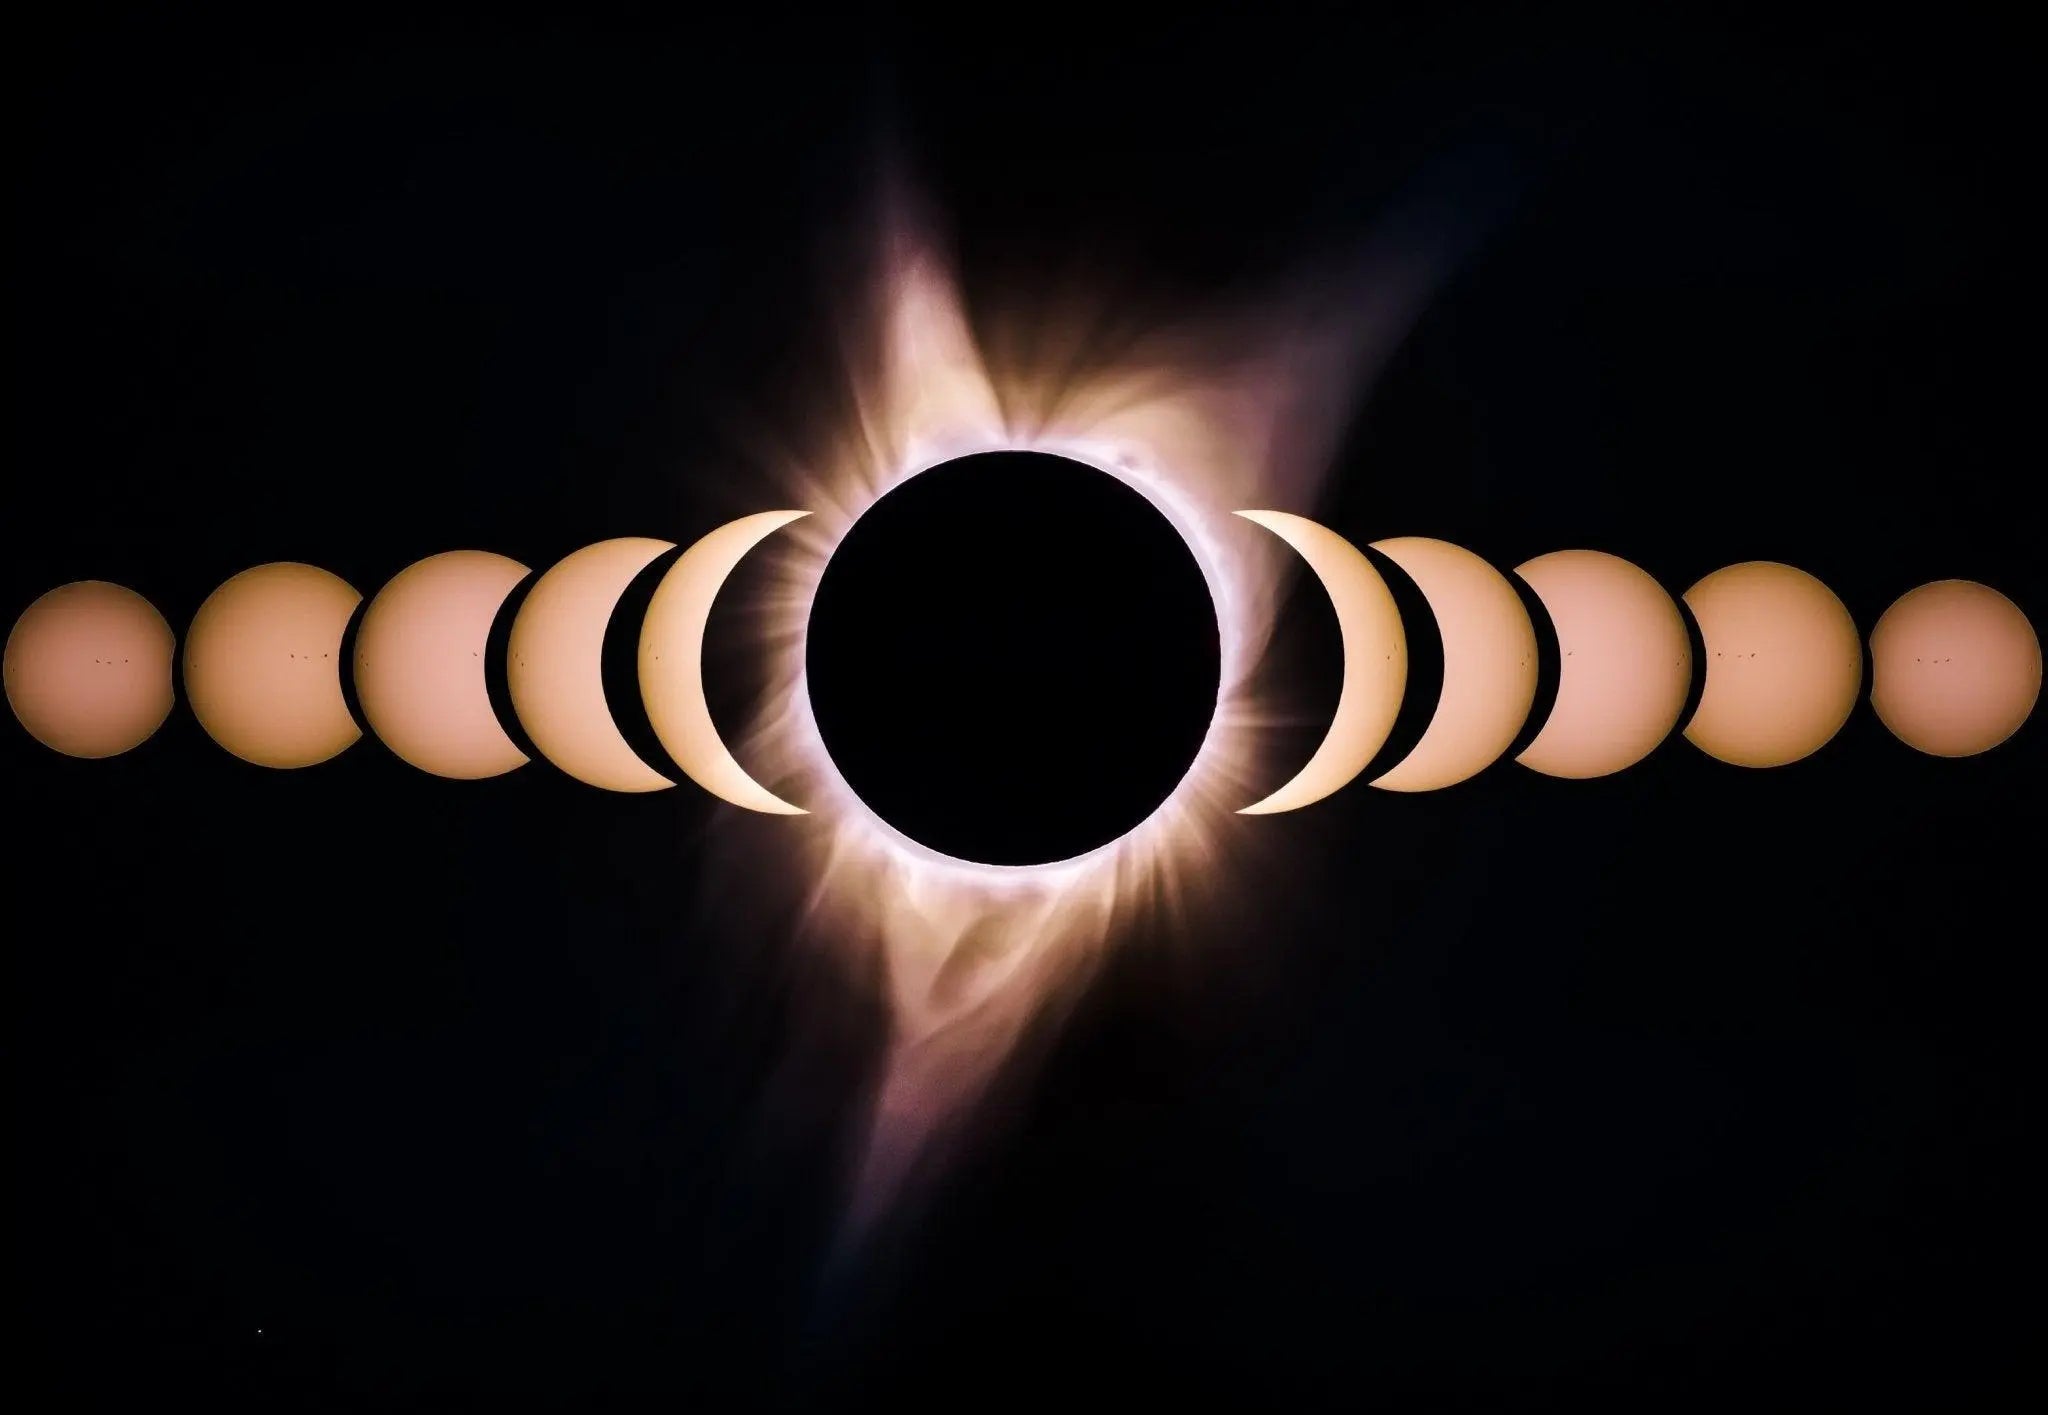
Solar Eclipse Timelapse Photography
Solar eclipses are among nature's most dramatic celestial events and present an exciting opportunity for photographers. Capturing a solar eclipse in a time-lapse sequence can be a rewarding experience, yielding impressive results. This guide will walk you through the steps of how to photograph and process your own solar eclipse time-lapses.
Planning Your Shoot
- Check the Eclipse's Visibility and Timing: It's essential to determine where and when the eclipse will be visible. Websites like NASA's Eclipse Website provide detailed information about the timing, path, and visibility of upcoming eclipses.
- Choose the Right Equipment: You'll need a digital camera with manual settings, a sturdy tripod, and a solar filter to protect your camera and your eyes. A timer remote control or an intervalometer will also be useful for shooting your time-lapse.
- Scout Your Location: Choose a location with a clear view of the sky. Keep in mind the direction and altitude where the sun will be during the eclipse. If possible, visit the location beforehand at the same time as the eclipse to understand the sun's trajectory and position.
Shooting Your Time-lapse
- Set Up Your Equipment: Mount your camera on the tripod, attach the solar filter, and set up your intervalometer or timer remote. Solar filters used for photography are not the same as the ISO certified eclipse glasses filters. Please contact us if you need help finding PET-coated filters for telephoto lenses.
- Configure Your Camera Settings: Set your camera to manual mode. Start with an ISO of 100 or 200, an aperture around f/8 to f/16, and a shutter speed of 1/4000s to 1/1000s. You'll need to adjust these settings as the eclipse progresses and the light levels change.
- Start Shooting: Begin your time-lapse sequence a few minutes before the eclipse's start time. Use your intervalometer or timer remote to capture an image every 10 to 15 seconds.
Processing Your Time-lapse
- Import Your Images: Import the images into your computer using a program like Adobe Lightroom or Adobe Bridge. This will allow you to make edits to multiple images at once.
- Adjust Your Images: In your editing program, adjust the exposure, contrast, and color balance as needed. You can sync these settings across all images to maintain consistency.
- Export Your Images: Export your images as high-quality JPEGs.
- Create Your Time-lapse: Import your sequence of images into a video editing software like Adobe Premiere Pro. Set each image to play for a short duration (e.g., 0.1 seconds) to create the illusion of motion in the final time-lapse video.
- Add Finishing Touches: Consider adding elements like music or text overlays to enhance your time-lapse. Then, export your final video.
Solar eclipse time-lapses are a rewarding challenge that marries astronomical phenomena with the art of photography. With careful planning, the right equipment, and post-processing, you can create stunning time-lapse sequences that encapsulate the awe-inspiring nature of solar eclipses. Always remember to protect your eyes and equipment when shooting solar events, and most importantly, take a moment to appreciate the spectacle of the eclipse itself.
Share:
How to Host an Eclipse Viewing Party, Don't Forget Your Eclipse Glasses!
Top Spots to View the October Eclipse with Eclipse Glasses